Wouldn’t you know it: just when my jeans are getting used to seeing themselves in their new custom color after their first visit to the Changing Your Clothes Day Spa, today they’re back for Phase 2: a little trim! They’ve let me know they’re not ready for a drastic change, so I’ve promised not to cut more than an inch… from each side. Yes, that’s right, they’re going to go from a classic boot cut to straight legs!
The first step in this seemingly simple process is to analyze the current conditions, in order to make a plan; I’ve learned (the hard way) that having a strategy before making that first crucial snip is the key to a successful outcome.
Tip: I realized, only after my jeans’ dye job last week, that it would have been better to do the leg alterations before dyeing the jeans, because guess what? That antique-gold-colored thread used for the topstitching on the inseam and hem got dyed along with the jeans! So the topstitching thread that I bought for this specific purpose won’t match. However, since I’m planning to overdye the jeans with black, I’m hoping the difference in thread color will not be so noticeable by the time this makeover is complete.
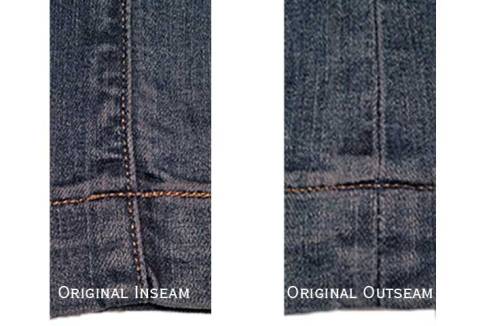
Looking at the jeans, I notice that the inseam is topstitched, but the outseam is not.
I have a few choices with the inseam:
1. Remove enough topstitching to undo the original seam before sewing the new seam, then re-do the topstitching and hope the thread matches reasonably well;
2. Remove all the topstitching, and not replace it after the new seam is done; or
3. Remove all the topstitching, and replace all of it.
I’m inclined to go with Option 2, for my usual reason: I’m lazy. I want to do the easiest thing. And replacing topstitching on the inseam of a pants leg that is already sewn (i.e. tubular) is not the easiest thing. Also, it eliminates the issue of the thread color possibly not matching. Yes, let’s go with that. Good, that part of the plan is on paper!
Next, I need to determine exactly how big a change I need in the width of the legs to get the straight legs I want.
Tip: There’s a difference between straight legs and so-called “skinny” jeans: with straight legs, the legs will narrow a little from the hip to the general vicinity of the knee, and the width stays the same the rest of the way down the leg. (You’ll see this in later photos here.) With skinny jeans, there’s much more of a taper down to the hem, so the width of the leg at the hem is much narrower than at the knee. Just wanted to make sure we’re clear on the terminology!
I discovered, quite by accident, that a great help in this part of the process is the cutting mat in the following photos; it’s marked in a grid of 1-inch increments, which makes it so much easier to align grainlines when cutting fabric, but the difference in leg width from the knee to the hem is also instantly obvious.
Tip: Cutting mats like these, which I believe are designed primarily for quilters (which I’m not), are readily available at fabric and craft stores like JoAnn.
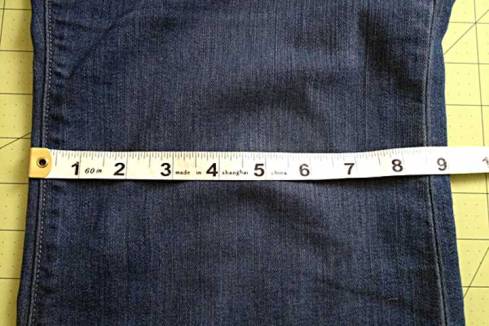
I’m starting by measuring the width of the leg to find the narrowest point; it’s about 9″, looks like just above the knee.
By aligning the leg seams at the hemline with vertical grid lines, I can immediately see that the leg is about 1″ wider on each side of the leg; when you add front and back and two sides of the leg, this translates into a total of 4″ that will be removed from the circumference of the leg.
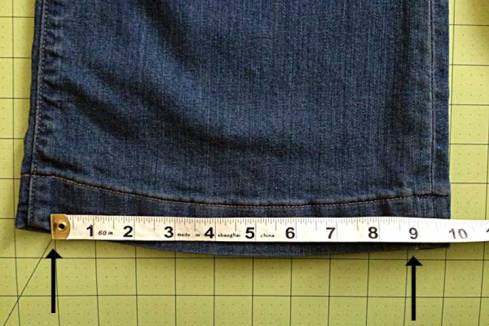
Hem measurement: by looking at where my 9″ measurement falls on the grid under the hem (each square = 1″), I can easily see the amount of adjustment needed.
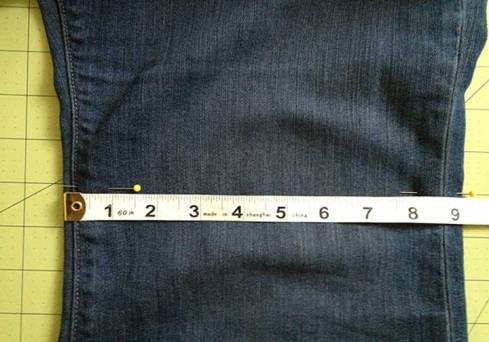
Now what I’m going to do is put some pins at the points where I got the 9″ measurement, to mark the point where I’ll start the new seam; I’ll need to rip out the seams to 1-2″ above this point, in order to make a smooth transition into the new seamline.
By laying my tape measure on the legs, more or less aligning with the gridline that goes vertically down from the pins, I can get a good visual impression of the difference my new seam will make.
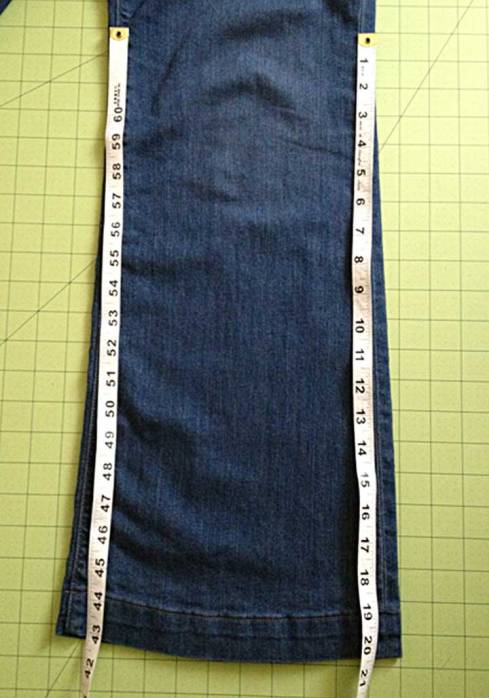
Getting a visual: laying the tape measure down the leg like this helps to visualize how much of an adjustment I’m going to make.
Here’s the plan from this point:
1. Undo hem, then undo seams to 1-2″ above the pinmarks;
2. Stitch new seams, finish seams;
3. Re-stitch hem, shortening if necessary.
Okay! I think I’m finally ready to start snipping away at the old seams! I’m a fairly recent convert to the humble seam-ripper; it really is faster than snipping with scissors in most cases, and I believe there’s also less chance of damaging the surrounding fabric. I’ll have to start by removing the hem stitching:
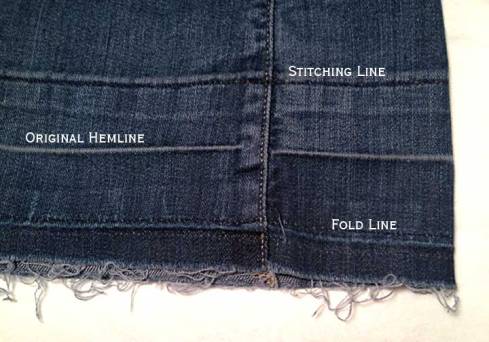
After undoing the hem: since I’m going to keep the original length, I’ll use these lines to restitch the hem when I’m done narrowing the seams.
Tip: Keep in mind that you may need to shorten your hemline a bit after narrowing the legs; this will depend on how big a change you make in the width of the hem. Generally speaking, the narrower the leg, the shorter the inseam needs to be if you want to avoid the “scrunching” effect around your ankles. As an example, the inseam on straight-leg jeans I’ve worn in the past was 32″ (to my ankle), but I need a 33-34″ inseam on boot-cut or wider legs. Since these boot-cut jeans were verging on too short going into this project, plus I’m not going extremely narrow on the leg, I think I may be able to keep the original hemline.
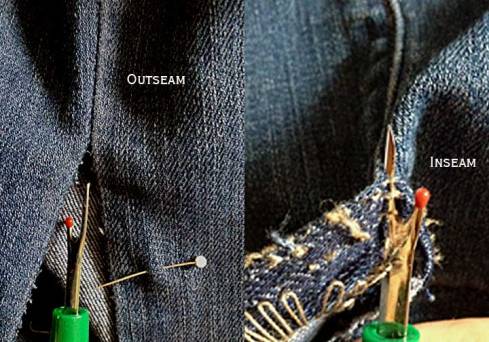
Now I need to undo the seams. I started with the outseam, which was easiest since it was only one row of stitching to remove. The inseam, on the other hand, had the seam, topstitching, and the serged seam finish to deal with; in the photo on the right (below), you can just make out the 3 threads on the seam ripper:
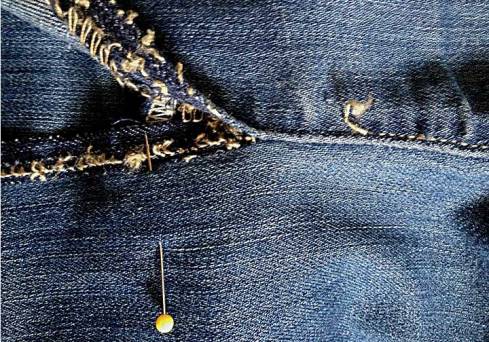
Ripping the inseam to about 1″ after the pin marker; the topstitching also has to be removed for another additional 1-2″, to be able to make a smooth transition from the old seam to the new one.
Tip: Be sure to clean up all the loose threads, then press all the seam allowances flat after ripping the seams; this will make it much easier to mark and sew your new seams.
Finally— after all this prolonged preparatory business, I can actually sew the seams! (Frankly, it seems a little anti-climactic. But at least I’m almost done.)
Tip: I’ve found it makes a noticeable difference to use a denim needle (that’s what they’re called on the package) when sewing heavy fabrics like, well, denim. If you can’t find these at your fabric store, a #14-16 regular-point needle should work.
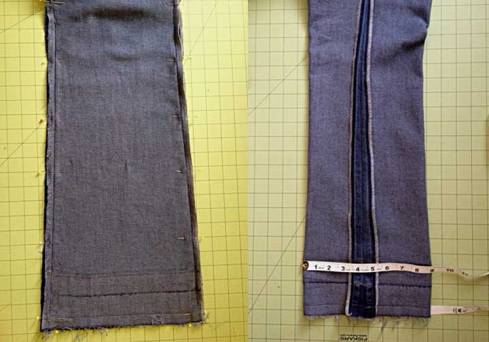
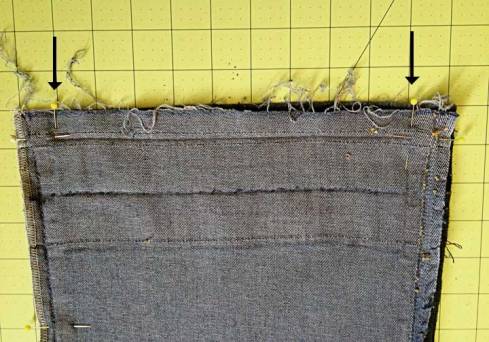
Before & after sewing seams: on the left, seams are pinned along the new sewing line. On the right is the finished outseam; you can see how gradual the taper is, and that the width is 9″, exactly what I wanted!
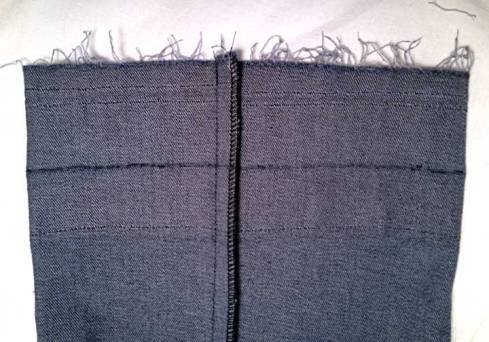
Finished new inseam (wrong side); I’ve serged this seam, but you can use a simple zigzag stitch too.
Tip: If you don’t have a serger, you can use a wide zigzag stitch to finish the raw edges of your seams.
After sewing the inseams, finishing the inseams with the serger, and pressing the new seams, all that’s left to be done is sew the hem!
Tip: With a deep hem like the one on my jeans, when you’re sewing the seams, be sure to only taper the new seam down to the point of the original hem fold; if you taper after that point, you’ll have trouble folding up your hem later, because the width at the bottom will be narrower than at the fold point of the hem. Don’t ask how I know this.
Tip: Because the topstitching thread is so much thicker than regular sewing thread, I don’t use it in the bobbin; this means I have to sew the hem from the right side, but that can be tricky. So I sew the hem first, from the wrong side, with regular sewing thread on top and in the bobbin, in a dark blue to blend into the fabric as much as possible. Then I turn it to the right side, put the gold topstitching thread in the top, and sew over the original sewing line.
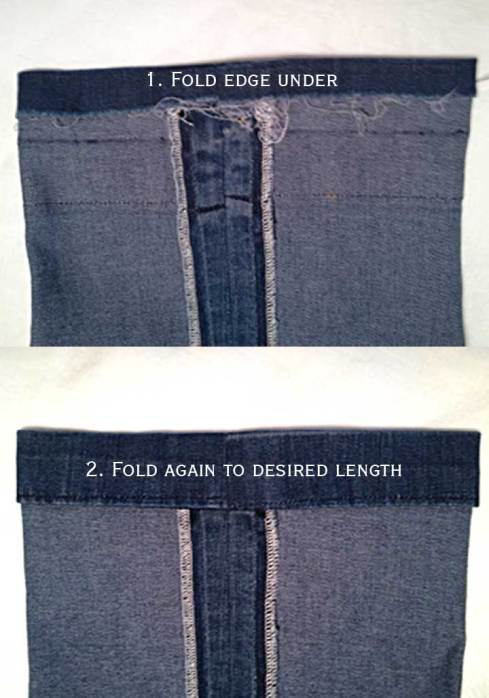
Another hem tip: If your denim is too heavy for your sewing machine to easily sew through 3 layers (in the typical jeans hem), try this: trim off the part that was turned under on the original hem, usually about 1/2″; serge (or zigzag-stitch) the new raw edge, fold and press the hemline in place, then stitch. This way, you’re only sewing through 2 layers of denim.
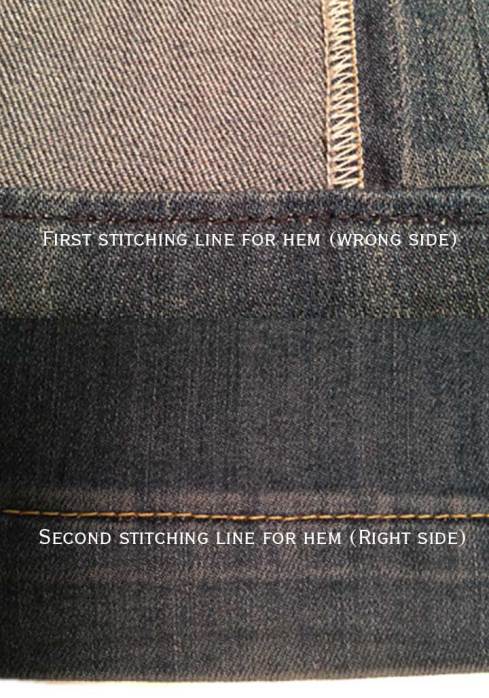
Stitching the hem: if you’re going to topstitch, stitch the hem with matching thread from the inside first, then stitch again on the outside with topstitching thread.
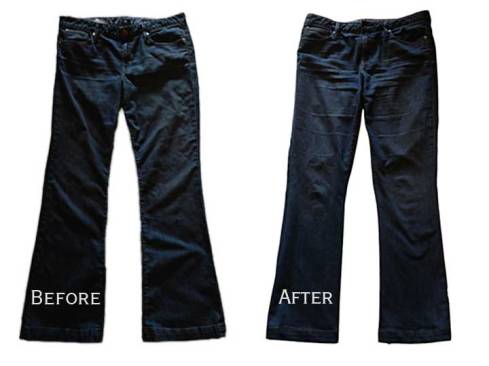
They’re done!
Another successful Makeover Monday at the CYC Day Spa! Don’t these jeans look thrilled with their chic, sleek new look?
Be sure to stay tuned for next week’s thrilling conclusion of this 3-part Makeover Monday: Dyeing to Finish!

February 5, 2013 at 1:30 am
Wow, impressive – great explanations, great job, and great results!
February 5, 2013 at 8:21 am
Merci, Kim! It’s amazing, the difference between just doing a quick alteration and having to figure out how to put it all into words and pictures that make sense. Hope this helps with your project!
February 5, 2013 at 9:03 am
Yes, merci beaucoup!
Pingback: Block Party: Adventures in Scrapland « Changing Your Clothes
February 8, 2013 at 10:26 pm
Why have I never thought of using a cutting mat grid as a reference?! Of course!
Pingback: It’s My Birthday, and I’ll Write What I Want To! « Changing Your Clothes
Pingback: Makeover Monday: Dyeing to Finish « Changing Your Clothes
Pingback: Makeover Monday: Special Bonus Feature! « Changing Your Clothes